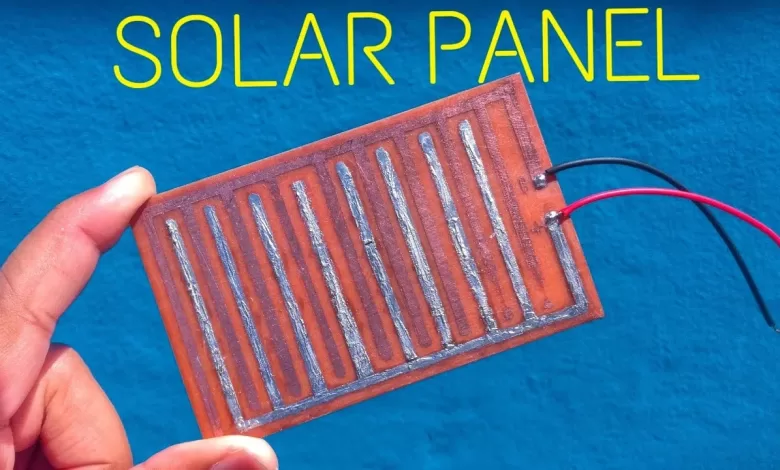
DIY Guide: How To Make Solar Cell Panels – Step by Step Instructions
Essential Materials for Building How To Make Solar Cell Panels?
Solar energy is becoming an increasingly popular way to power homes and businesses. One of the most cost-effective ways to harness this energy is through the use of solar cell panels. Solar cell panels are devices that convert the energy from the sun into electricity. In this guide, we will discuss the process of how to make solar cell panels, including the materials and tools you will need, as well as step-by-step instructions on how to assemble the panel. This will also help you How to make a logo in illustrator | Adobe illustrator Pro Tips
Essential Materials for Building How To Make Solar Cell Panels?
The essential materials for building solar cell panels include:
- Solar Cells: These are the main component of a solar panel and are responsible for converting sunlight into electricity. They can be purchased from a solar panel supplier.
- Soldering Iron: This tool is used to connect the solar cells together.
- Soldering Wire: This is used in conjunction with the soldering iron to make connections between the solar cells.
- Flat Surface: A flat surface is needed to assemble the solar cells on.
- Clear Plastic Sheet: This is used to cover the panel to protect it from the elements.
Other materials that may be required depending on the design of the solar cell panel for How To Make Solar Cell Panels:
- Tabbing Wire: This is used to connect the solar cells together in a series
- Bus Wire: This is used to connect the solar cells in parallel
- Encapsulant: This is a liquid or sheet material that is used to protect the solar cells from moisture and other environmental elements.
- Junction Box: This is used to connect the solar cells to the inverter and other electrical components of the solar panel system.
- Silicone: This is used to seal the edges of the panel and provide additional protection from moisture.
It’s important to note that you should always follow the instructions and guidelines provided by the solar cell supplier for making How To Make Solar Cell Panels, as the materials and their quantities may vary depending on the supplier and the type of solar cell panel you are building.
- Solar Cells (also known as photovoltaic cells) are the main component of a solar panel and are responsible for converting sunlight into electricity. They are made up of semiconductor materials, such as silicon, which absorb the photons from sunlight and release electrons. These electrons are then captured by a circuit, which converts the energy into electricity.
- Soldering Iron: This tool is used to connect the solar cells together. A soldering iron is a device that produces heat to melt the solder and join two metal surfaces together. The heat is generated by an electric current passing through a metal coil and is directed towards the tip of the iron. The tip of the soldering iron is coated with a metallic alloy, which melts when heated, and is used to connect the solar cells together.
- Soldering Wire: This is used in conjunction with the soldering iron to make connections between the solar cells. Solder wire is a metallic alloy that is melted by the soldering iron to make a connection between two metal surfaces. The solder wire is available in different alloy compositions and thicknesses depending on the application.
- Flat Surface: A flat surface is needed to assemble the solar cells on. This could be a wooden board, table or any other surface that is flat. It’s important that the surface is clean and free of debris to ensure that the cells are arranged in a neat and orderly manner.
- Clear Plastic Sheet: This is used to cover the panel to protect it from the elements. The plastic sheet is placed over the solar cells after they have been assembled and soldered to protect them from moisture and other environmental elements. Clear plastic sheets are preferred as it allows the sun to pass through and provide maximum efficiency to the solar cells. The sheet is usually UV protected, clear, and flexible with a high transparency rate. Watch This
List of Steps For How To Make Solar Cell Panels
Understand the basics of solar cell panels
Solar cell panels, also known as photovoltaic (PV) panels, are devices that convert the energy from the sun into electricity. They are a key component of solar energy systems and are becoming increasingly popular as a way to power homes and businesses. Understanding the basics of solar cell panels is essential when it comes to building your own solar cell panel, as it will help you to understand how the panel works and what materials and tools you will need.
Solar cell panels are made up of photovoltaic (PV) cells, which are responsible for converting sunlight into electricity. PV cells are made up of semiconductor materials, such as silicon, which absorb the photons from sunlight and release electrons. These electrons are then captured by a circuit, which converts the energy into electricity. The electricity produced by the solar cells is direct current (DC) electricity, which needs to be converted into alternating current (AC) electricity through an inverter, in order to be used in most homes and buildings.
Each PV cell is made up of two layers of semiconductor material, a positive layer, and a negative layer. When sunlight hits the solar cell, it causes the electrons in the semiconductor material to become excited and move from the negative layer to the positive layer. This flow of electrons creates an electrical current, which is then captured by a circuit and converted into usable electricity.
Gather necessary materials and tools
When it comes to building your own solar cell panel, it’s important to gather the necessary materials and tools before getting started. Below is a list of materials and tools that you will need to assemble a solar cell panel:
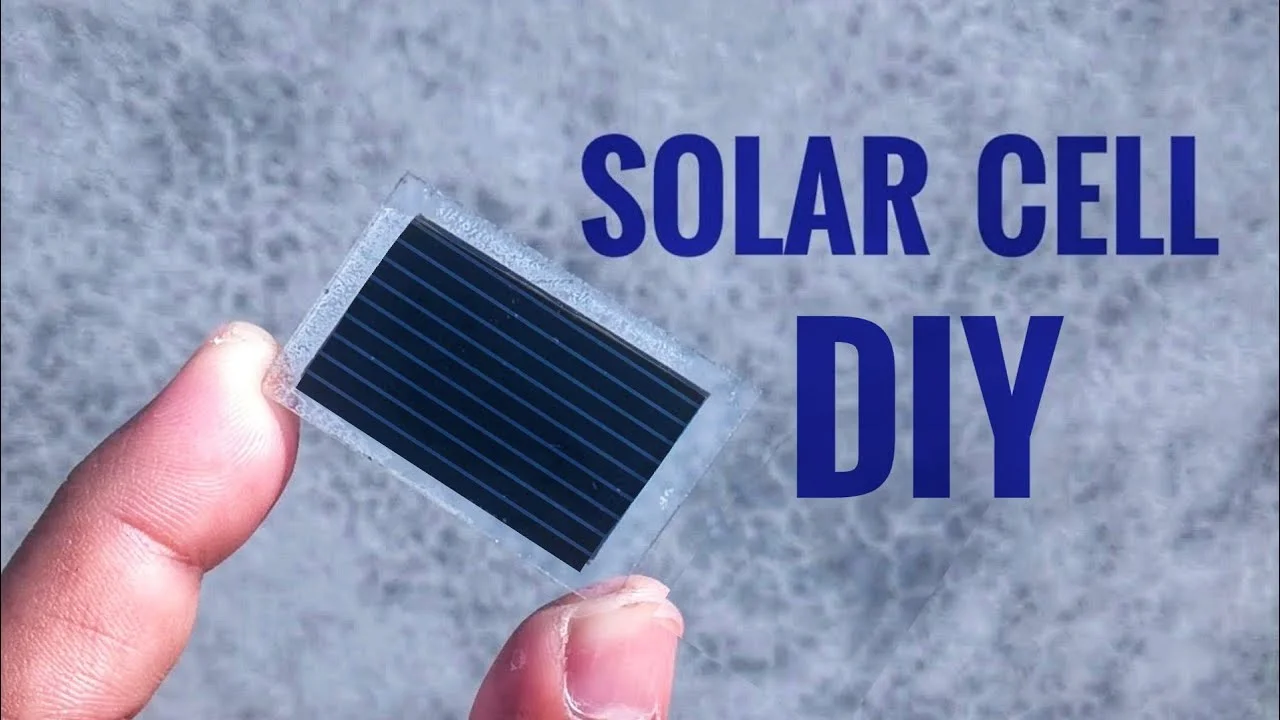
- Solar Cells: The most important component of the solar cell panel, solar cells are responsible for converting sunlight into electricity. They can be purchased from a solar panel supplier.
- Soldering Iron: A soldering iron is a tool that produces heat to melt the solder and join two metal surfaces together. It will be used to connect the solar cells together.
- Soldering Wire: This is used in conjunction with the soldering iron to make connections between the solar cells. Solder wire is a metallic alloy that is melted by the soldering iron to make a connection between two metal surfaces. The solder wire is available in different alloy compositions and thicknesses depending on the application.
- Flat Surface: A flat surface is needed to assemble the solar cells on. This could be a wooden board, table or any other surface that is flat. It’s important that the surface is clean and free of debris to ensure that the cells are arranged in a neat and orderly manner.
- Clear Plastic Sheet: This is used to cover the panel to protect it from the elements. The plastic sheet is placed over the solar cells after they have been assembled and soldered to protect them from moisture and other environmental elements. Clear plastic sheets are preferred as it allows the sun to pass through and provide maximum efficiency to the solar cells.
- Tabbing Wire: This is used to connect the solar cells together in a series, it’s a thin copper wire that allows the current to flow from one cell to another.
- Bus Wire: This is used to connect the solar cells in parallel, it’s a thicker copper wire that allows the current to flow from one cell to another.
- Encapsulant: This is a liquid or sheet material that is used to protect the solar cells from moisture and other environmental elements.
- Junction Box: This is used to connect the solar cells to the inverter and other electrical components of the solar panel system.
- Silicone: This is used to seal the edges of the panel and provide additional protection from moisture.
It’s important to note that you should always follow the instructions and guidelines provided by the solar cell supplier, as the materials and their quantities may vary depending on the supplier and the type of solar cell panel you are building.
Arrange solar cells in a grid on a flat surface, making sure the positive side of each cell is facing up
Once you have gathered all the necessary materials and tools, the next step in building a solar cell panel is to arrange the solar cells in a grid on a flat surface. The solar cells should be placed in a neat and orderly manner, with the positive side of each cell facing up.
To start, lay out the solar cells on the flat surface. The cells will have one side that is slightly different in color or texture, this is the positive side, and it should be facing up. Once you have identified the positive side of each cell, begin arranging the cells in a grid pattern. The cells should be placed side by side, with a small gap between them to allow for soldering.
To make sure the cells are properly aligned, you can use a ruler or straightedge as a guide. It’s important to take your time and be precise when arranging the cells, as any misalignment can affect the performance of the solar panel. Once the cells are arranged in a grid, they are ready to be soldered together to complete the panel.
It’s important to note that solar cells are fragile, so it’s recommended to handle them with care and avoid any scratches, as these can negatively affect their performance. Make sure to keep them in a clean, dust-free environment and to assemble them in a well-ventilated area.
Solder cells together, connecting the positive side of one cell to the negative side of another.
After arranging the solar cells in a grid pattern on a flat surface, the next step in building a solar cell panel is to solder the cells together. Soldering is the process of connecting the positive side of one cell to the negative side of another, creating a circuit that allows the electricity to flow through the cells.
To start soldering, heat up the soldering iron. Once the iron is hot, apply a small amount of solder wire to the tip. Then, using the iron, touch the tip of the iron to the positive side of one cell and the negative side of another cell. The heat from the iron will melt the solder wire, creating a connection between the two cells. Make sure to apply enough solder wire to make a secure connection, but not too much that it forms a blob and causes a short circuit.
It’s important to keep in mind that the positive side of one cell should always be connected to the negative side of another cell, forming a series circuit. The cells are then connected in parallel to increase the current capacity. Repeat the process with the rest of the cells, making sure to keep the cells in the same alignment as when you arranged them in the grid.
Once all the cells are soldered together, the solar cell panel is complete. It’s important to test the panel to make sure it’s working correctly, by measuring the voltage and current produced by the panel. The final step is to encapsulate the panel with an encapsulant, to protect it from moisture and other environmental elements.
It’s important to note that soldering is a skilled task that requires practice and patience. It’s recommended to have some experience with soldering or to seek professional help, to avoid any mistakes that can damage the solar cells or affect the performance of the panel.
Connect wires to the panel, making sure positive is connected to the positive side and negative to the negative side.
Once the solar cells have been soldered together, the next step in building a solar cell panel is to connect the wires to the panel. This step is crucial as it ensures that the electricity produced by the panel is directed to the right place.
To start, identify the positive and negative terminals of the panel. The positive terminal is usually marked with a “+” symbol, and the negative terminal is marked with a “-” symbol. The positive terminal is connected to the positive side of the solar cells, and the negative terminal is connected to the negative side of the solar cells.
Take the tabbing wire, which is a thin copper wire, and connect it to the positive side of the first solar cell, and then to the negative side of the next solar cell, this will connect the cells in series. Repeat the process until all the cells are connected in series. Once all the cells are connected in series, take the bus wire which is thicker than the tabbing wire, and connect one end to the positive side of the first cell and the other end to the positive side of the last cell, this will connect the cells in parallel.
Once the wires are connected to the panel, make sure that all the connections are secure and free of any excess solder or debris. Before connecting the panel to an inverter, it’s important to test the panel to ensure that it’s producing the correct amount of voltage and current.
It’s important to keep in mind that connecting wires to the panel is not a task for beginners, and it’s recommended to seek professional help or have some experience with electrical wiring before attempting this step. It’s essential to follow safety guidelines and instructions, as working with electricity can be dangerous. Also, make sure that you use the correct type of wire for the panel and the right amperage rating.
Cover the panel with a clear plastic sheet to protect it from the elements.
Once the solar cell panel is complete and the wires are connected, the final step in building a solar cell panel is to cover it with a clear plastic sheet to protect it from the elements. This step is crucial as it ensures that the panel will last for many years and perform at its best.
To start, measure the dimensions of the solar cell panel and cut a piece of clear plastic sheet to size. The plastic sheet should be large enough to cover the entire panel, with a few inches of overlap on all sides.
Once the plastic sheet is cut to size, place it over the panel, making sure that it’s centered and that the edges of the plastic sheet are even with the edges of the panel. The plastic sheet should be placed over the panel so that it covers the solar cells and the wires.
Once the plastic sheet is in place, use silicone to seal the edges of the panel. This will ensure that the plastic sheet is securely attached to the panel and that it’s completely sealed to protect the solar cells from moisture and other environmental elements.
It’s important to choose a high-quality clear plastic sheet that is UV resistant, to allow the sun to pass through and provide maximum efficiency to the solar cells. Also, make sure that the plastic sheet is flexible, with a high transparency rate, to avoid cracking or breaking when exposed to the elements.
By following these steps, you’ll have a solar cell panel that is ready to produce clean, renewable energy. It’s important to note that covering the panel with a clear plastic sheet is a crucial step that should not be skipped, as it will help to protect the panel from the elements and ensure that it lasts for many years.
Table of Tools and Materials used for How To Make Solar Cell Panels?
| Tools and Materials | Description |
|---|---|
| Solar Cells | The main component of the solar cell panel, responsible for converting sunlight into electricity. |
| Soldering Iron | A tool that produces heat to melt the solder and join two metal surfaces together. Used to connect the solar cells together. |
| Soldering Wire | Used in conjunction with the soldering iron to make connections between the solar cells. |
| Flat Surface | A flat surface is needed to assemble the solar cells on. This could be a wooden board, table or any other surface that is flat. |
| Clear Plastic Sheet | Used to cover the panel to protect it from the elements. The plastic sheet is placed over the solar cells after they have been assembled and soldered to protect them from moisture and other environmental elements. |
| Tabbing Wire | Used to connect the solar cells together in a series, it’s a thin copper wire that allows the current to flow from one cell to another. |
| Bus Wire | Used to connect the solar cells in parallel, it’s a thicker copper wire that allows the current to flow from one cell to another. |
| Encapsulant | This is a liquid or sheet material that is used to protect the solar cells from moisture and other environmental elements. |
| Junction Box | This is used to connect the solar cells to the inverter and other electrical components of the solar panel system. |
| Silicone | This is used to seal the edges of the panel and provide additional protection from moisture. |